Breeding Season Tips for your Dairy Goats

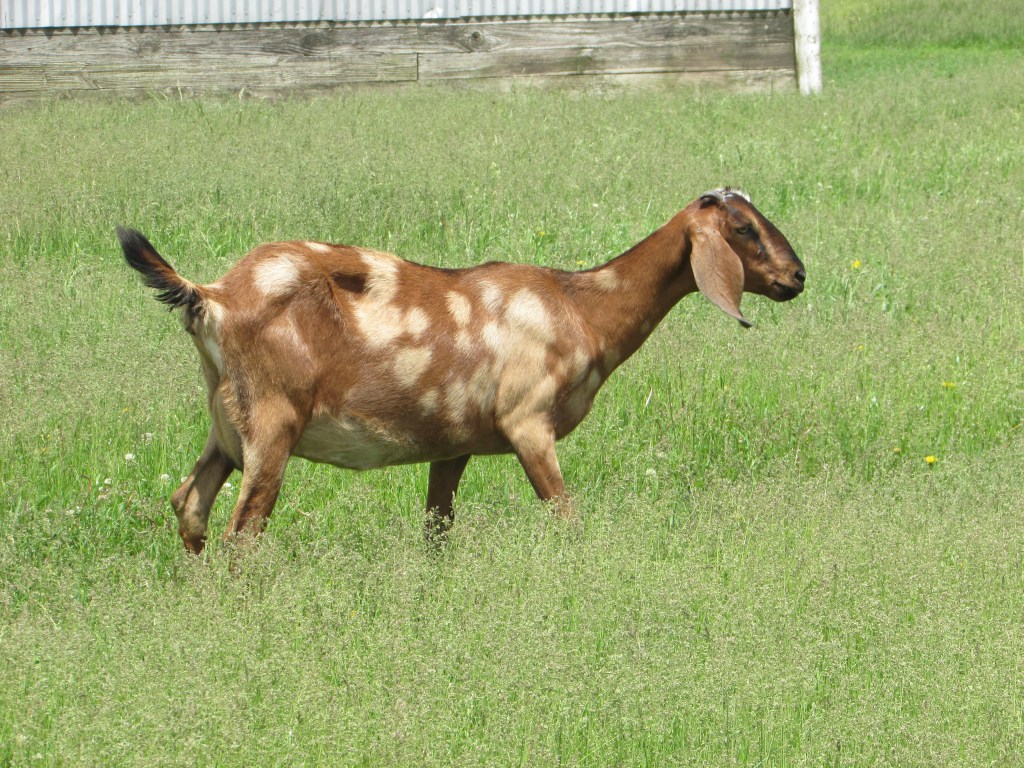
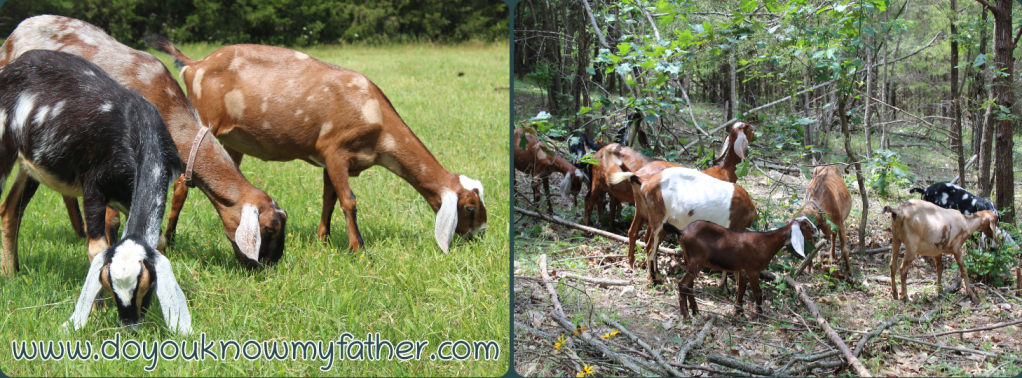
Breeding season is here for the goats!

Our family has been raising Nubian goats for about 6 years. We have found a few things to make our breeding and birthing seasons go better and be more successful. We thought maybe they would help other folks as well.

The goats are the price of the field. And thou shalt have goats’ milk enough for thy food, for the food of thy household, and for the maintenance for thy maidens.

Prov. 27:26-27

The biggest thing is to keep their minerals in balance. As we have stated in other posts, we keep minerals available at all times. We have poor soil and they are not able to get everything they need from it. Goats are ruminants and have high mineral needs. This is why they forage, trying things out here and there, and testing what they need and how much of it they need, with their sensitive mouths.

We have found Red Raspberry leaf to play a big role in fertility. It helps balance the hormone levels in the body, and causes the does to drop more eggs to then be fertilized. This means you’ll have more kids in the spring! We add about a 1/4 cup this daily to their water, for about 6 weeks coming up to breeding. It will discolor the water, and make it look like tea, but they still like it.

The soils around our farm are very, very deficient in Selenium. To help assimilate selenium, the body (ours and our goats’) needs vitamin E. So about 6 weeks before breeding, we give a BoSe shot, which is a mix of Selenium and Vitamin E to be given Sub-Q (Subcutaneous/Sub-Q is when the shot it given under the skin, verses injected into the muscle). In our state, this is only obtainable from our vet, but what we use can be found here. Selenium helps their muscles, help prevent miscarriages and stillbirths, and prevents the kids that will be forming from being born with white muscle disease.

Copper also plays a big role in fertility. If the goats do not have good copper levels, their coats will be dull, they will have worm infestations, and will not cycle regularly or possibly not at all. We give 1/2-1 teaspoon per head per week, and also have it to where they can get it if they need it. Copper is VERY important for the health of livestock.

You will need to have your buck ‘powered up’ in advance of him ‘working’. Make sure he is getting some grain, because otherwise he may lose some condition. We give our bucks about 2 cups/day, mixed with ACV. The ACV (apple cider vinegar) helps prevent the buck from getting kidney stones, as too much grain can cause this problem. We have thankfully never had it, but know others who have, and have a Dad who has! It is very painful.

When preparing for breeding season, think about what God says in Prov. 27:23

Be thou diligent to know the state of thy flocks, and look well to thy herds.

This means you need to have the ‘Shepherd’s Eye’ on what your livestock needs. It is part of being a Good Shepherd. Just like how our Good Shepherd, knows what each of us needs, and it isn’t always the same thing for each person at the same time.

Your planned ‘first fresheners’ will need to be looked at. Are they very large? They may need their feed backed down so they can lose any extra pounds before they are bred. Sometimes overly fat does won’t take, or won’t cycle right. We’ve had this happen once.

Are they pretty small? They may need some grain, alongside these other things, to get them cycling well and nourished enough to not just continue to grow themselves, but some little ones as well.

Looking at your milkers, do you need to start drying them off? Or do you need to up their grain intake so they can be in good condition to take to another breeding, continue to milk well and maintain their own condition? Is one of them milking well enough that she can ‘milk through’ without being bred this year? Is one ready to retire, having had her best milking life behind her?

Check their FAMACHA levels. (See chart below if you don’t know what this is.) You may need to give more copper in rainy weather. If the worms come on them quickly, especially the Barber pole worm, they can drink pints of blood in a day and bring a goat down quickly, see our Worms & Goats post here.

 These are things we do and the things we consider when getting ready to breed our goats.

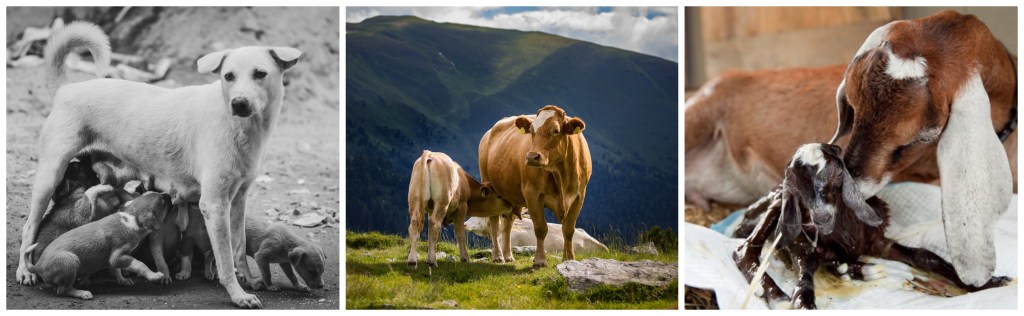
And of course, we always pray that we are blessed with a happy, healthy, successful kidding season!

Working with Wool Part. 2 Combing and carding

Step 1 Combing your wool

Now that your wool is washed and dried, it’s time to comb. Combing your wool really helps in getting your wool cleaned from any leftover Vegetative Matter. (You can skip this step if you have clean wool, if you’d like and go right to carding.)

To begin, take a lock of wool and put it on one of your combs,and run your empty comb through your wool, flipping your comb after each pass through, like pictured below:

Once all your wool is off the comb you started with and onto the other, removing any small pieces of wool left on your comb. Keep doing this until your happy with how clean your wool is. To remove your wool you have two options, one is to just take the whole thing off in one piece or, you can make combed top by running it through a diz (we use a sewing machine bobbin as a diz and it works well) as you take it off, like pictured below:

If you do it this way, you are ready to spin your wool into yarn, if not it’s time to card.

Step 2: Carding your wool

There are two different ways to card, either with hand cards or a drum carder. We have done it both ways and prefer drum carding.

We’ll start with using hand cards: Spread the wool on the left card, with the shorn ends at the top of the card. Take the right hand card and lay it in the center of the left hand card, facing opposite directions. Draw the right hand card away from you. Repeat this several times until the fiber begins to align themselves. When the fibers are well aligned lay the right hand card on your knee, and with the handles in the same direction, brush away from yourself. This puts the wool all on your right hand card. Switch cards and repeat this several time. Roll the wool off the card. Your wool is ready to spin into yarn!

Drum carding: Put wool on the feeder in front of the little drum, turn the handle to feed the wool through onto the big drum. Keep adding more wool until your big drum is full and fibers are aligned. To remove your wool from your drum, turn your handle until the groove in your big drum is on top. Next, run a knitting needle down the groove, pulling up to separate the wool. Fold the off the drum turning the handle the opposite direction of the way you did when carding. Once your batt is off, divide it into three inch pieces.

Run it through on piece at a time, once your finished running it through the second time, it’s time to take it off and spin it!

Again there are two ways to take your wool off the drum. First is to take it off just like you did when you took it off to run it through the second time, in one big batt. The second is to make roving out of it by using a diz pictured below:

Making roving: To make roving you start at one end of the drum put your knitting needle in the groove about a 1/2 inch and pull put breaking your wool apart. Put your wool through your diz using a crochet hook. Gently pull your wool through your diz and off your drum, turning your drum as you go. Keep working your way across the drum. Once your finished, roll your roving into a ball and your ready to spin!

Working With Wool Pt.1- Picking, Washing & Drying

She seeketh wool, and flax, and worketh willingly with her hands.

Proverbs 31:13

There are different ways to wash wool. The way explained here is what we use, and what works best for us.

What you’ll need:

Wool

Containers

Water, hot and cold

Soap

Mesh Laundry Bags (optional)

Place to dry

First, we choose how much wool to wash. Some people wash a whole fleece in a bathtub. We used to do this, until we clogged a bathtub drain! So, we switched to washing in small totes, like this one pictured here.

Some people wash in kitty litter trays with sifters. This is a good idea because there’s even less agitation this way, and the bottom of your wool gets rinsed better.

Before washing we pick out any big pieces (in fiber circles, this is called ‘Vegetative Matter’ or ‘VM’*.) This removes the temptation of trying to take out any pieces while your wool is wet. You don’t want to do that, because the more you agitate your wool, the more likely it is to felt it. *A term to describe all grass seeds and burrs found in wool.

Fill your containers with cold water. Add your wool. You can let your wool soak the water in, or gently press it down. You can let this sit for 15 minutes to overnight, depending on how dirty your wool is.

When finished soaking, dump out your water, if your using a tote, gently place your hand over your wool and dump out your water. If your using a litter tray, lift out your sifter, and place it sideways on the tray, (like in the picture below) to let the water drain out, then dump out your water.

Again, depending on how dirty your wool is, you can repeat this process if you want to.

Now it time to soak it in hot water. Fill your containers with hot water. If your using totes, take a cup and fill it with the hot water, and gently pour it over the wool. If using the trays, before putting the sifter back in place, fill your tray with hot water then, put your tray back in place. Let this soak for 15-20 minutes. The goal is to keep your water hot, because if your water turns cold it could ruin your wool. So, to make sure this doesn’t happen it is good to set a timer. That way you don’t go and do something else while your waiting and forget about your wool.

Once the timer goes off, you are going to drain the water and repeat this process one more time, before adding soap.

There are special kinds of soap for washing wool, that don’t sud,and cut grease better than normal soaps, like the kind we use for laundry and dishes. (When the soap suds it is hard to rinse out.) But you can just use dish soap or shampoo,we’ve used both, and they do a good job, just do your best not to get very many suds. The goal is to cut the grease and get the lanolin out of the wool. The Unicorn products have very good reviews for doing this successfully.

Refill your containers with hot water. If your using shampoo or dish soap, add it after you’ve filled your containers and stir without making a lot of suds. You’ll need about 3 TBSP of soap,we just eye it.

Let this sit for 15-20 minutes, remember not to let the water cool.

Drain. Repeat one more time.

Now it’s time to rinse your wool. Refill your containers with hot water, this time don’t add soap.

Let it soak for 15-20 minutes. Drain. Repeat two or three times depending on the amount of soap left in the wool. Drain.

To dry wool, we either set it outside to dry, if it’s not raining. If it is raining, we use a cooling rack and set the wool on it in front of a fan.

Some people put it in mesh laundry bags and put it in the washer on spin, and then lay it out to dry. Now that your wool is out of the water its okay to do this, because it won’t felt now.

Once your wool is dry you can store it in storage bags.

In part two, (coming soon) we’ll explain how to pick and card.

Treating Mastitis in Goats Naturally

Causes of Mastitis:

Stress

Injury

Unsanitary milking conditions

Unsanitary pens

Not milking a doe before kidding, and letting the udder fill and get hard.

Drying doe off too quickly

Symptoms include:

-Hot painful udder

-Hard udder

-Clots in milk

-Occasionally blood in milk (this makes the milk turn pink)

Mastitis Treatment:

Hot STRONG Mullien Tea

-2 quarts of water

-5 large Mullien leaves (½ cup dried)

Add your water and Mullien to your tea kettle or pot.

Bring to a boil. Let steep for 20 minutes.

Apple Cider Vinegar drench:

-1 cup Apple Cider Vinegar

-2 TBSP Epsom Salt

-Fresh Lemon Juice from one lemon

Add the above to a long necked bottle, and fill the rest of the way with water.

This can be reused as well. Shake well before each use.

Essential Oil Blend:

-1/2 cup melted coconut oil

-1 TBSP peppermint oil

-1/2 tsp tea tree oil

-1/2 tsp eucalyptus oil

Heat your coconut oil, once warm remove form heat.

Add essential oils to your warmed coconut oil. Don’t add the essential oils to the coconut oil before you heat it up, it will burn your eyes.

Instructions:

Bring out your hot Mullien tea, a bowl, and rags (make your tea as hot as you can stand).

Pour tea in bowl, over top of rags. Squeeze out rags and place on udder, massaging while holding the rag on the effected area. Do this until your tea is warm.

You can reheat and reuse this a few times, just make sure you put it somewhere that nobody will try to drink it.

Milk out as much as you can. After your done milking, drench the teats.

After drenching massage the warmed oil blend on the whole udder.

(Don’t bring out your oil blend until your ready for it, other wise it will cool before you use it.)

Mastitis Prevention

Keep pens clean with fresh bedding.

Wash udder and teats especially paying attention to clean the orifice.

Milk out doe before kidding if udder starts to get tight.

Have Dolomite available at all times

When drying off does, pay close attention to bag tightness

Treating Ringworm

Ringworm is a common fungal disease in goats. It is a fungus, not a worm, and mostly appears during prolonged periods of wet weather. As with many other skin conditions, keeping the loafing and sleeping areas clean and dry will help reduce the occurrence of ringworm.

Ringworm can be located almost anywhere on the goat’s body. Left untreated, it gets bigger and bigger.

Warning: Ringworm is contagious both to other goats and livestock, and even to humans.

In the case of ringworm, we treat twice daily.

Treatment: WEAR STERILE RUBBER GLOVES WHEN TREATING RINGWORM!

We begin by (again, wearing gloves) picking the ringworm ‘scabs.’ After the scabs have been ‘picked,’ dry any puss that comes out with a paper towel. Spray with WD-40 on any area showing ringworm signs. Allow to rest with this until evening.

Evening Treatment: Apply straight tea tree oil on any area showing ringworm signs, then spray with iodine. Dust with sulfur, and give 1 tsp sulfur internally. We also at this time give 1 tsp of copper sulfate, along with a Tbsp of dolomite internally.

We continue this treatment until all areas dry up; we then let it scab over. Most of the time, this comes about 8 days after treatment. It will normally take about 3 weeks for the hair to grow back in the affected areas.

Treating Milk Fever Naturally

Milk fever can occur in many types of livestock and animals. We have personally experienced it with a few cows, a goat, and a dog.

It normally occurs after the birthing process/end of pregnancy, when the animal begins to lactate. (Making milk to feed it’s young.)

The cause of milk fever, is a depletion of the blood calcium and magnesium levels too quickly. The animal’s reserves, of these minerals, are not high enough to both sustain it’s life and the life of it’s young, through the mineral output of the milk.

-Prevention-

The best prevention for milk fever, and many, many other ‘diseases’, is to have the animal’s mineral levels, at the right levels in the first place. This is especially true, when approaching the birthing process.

In livestock you can keep their minerals up by having them graze, so they can get what they can from the land and plants. You should also have their loose mineral supplements available free choice. They know their needs, and they will take what they need once they become accustomed to the system.

We try to have following available to them:

Kelp, for iodine and trace minerals

Dolomite, for calcium and magnesium

Sulfur, for assimilation of selenium, external parasite prevention, and coat health

Copper, for internal parasite prevention, immune system, white blood cell and antioxidant production

Redmond salt. helps maintain weight and appetite, while also providing trace minerals.

When your animals have the correct levels of minerals, you are blessed with a lot less dis-ease. If your soils, or the soil your hay is grown on, is known to be deficient in certain minerals, make sure they have access to that mineral. Also, be sure to remineralize your pastures and hay fields.

What about Mankind?

It is the same with our own health. Dis-ease, is just that; your body is not at ease. God says He made us from the dust of the Earth.

“And Yehovah, God formed man of the dust of the ground, and breathed into his nostrils the breath of life; and man became a living soul.” Genesis 2:7

Disease comes from deficiency in one or more minerals. Our bodies do not have a drug deficiency, so when we take drugs, they don’t fix the dis-ease of our bodies. They often times just mask the problem, and then cause side effects. With these side effects, come more drugs to “help” with those side effects. This is not a true solution to the problem.

We are “fearfully and wonderfully made.” Psalm 139:14

Our body was made from the dust, which is made of minerals, and they all have their function in the process of our bodies.

Calcium and Magnesium

Calcium and magnesium are the most important minerals, especially in prevention of Milk Fever.

This is very important before, during, and after a pregnancy and lactation.

Be alert and especially watchful of your animals’ health always, so you will notice any changes in behavior that might alert you to an issue or mineral deficiency. This is ALWAYS important, but even more so towards to end of a pregnancy. There are big demands on the animals body, as it is both sustaining itself and their young. The last stage of pregnancy, is also, when the baby grows the most.

Plus, their body is preparing to nourish their young with milk! This takes a lot of minerals, and if they don’t have them, they can’t give them.

God says this, and, if we obey Him, we can save ourselves loss, pain, and suffering for our animals.

We now feed our livestock organic alfalfa pellets, along with a small amount of other mixed grains (oats, wheat, corn, etc.) in the final stages of pregnancy. This also helps with keeping up the minerals, as well as providing extra nourishment and reserves for the lactation.

Since we have been doing the above things, we have not had our animals suffer any milk fever, although our soils are very poor.

Signs and Symptoms of Milk Fever

There are several signs of Milk Fever, the most common are listed below.

(In dogs, it may seem like just a prolonged continuance of labor signs- however; she will not be visibly contracting, or giving birth to more pups.)

-Treatment- (Livestock)

Many books will tell you to give Propylene Glycol. While this helps instantly, it only offers temporary relief. While it raises the blood sugars, it DOES NOT address the mineral deficiency, which started the disease in the first place.

We start treating, by giving B Vitamin shots to stimulate the appetite. This is VERY important! In our experience, once they get ‘down’ you probably won’t be able to get them to take in anything, including mineral. We then offer all the hay they can eat, with molasses on it.

We gave NutriDrench, according to the dosage on the bottle, 3x daily. It contains many vitamins and minerals. We give this with a syringe, right into their mouth.

It is important to give them all the kelp they can eat. This was the most effective home treatment we found. It is FULL of minerals.

Calcium Gluconate, in IV form (our vet administered) helped both of our cows, more than anything else. This must be given slowly, as to not stop the heart from beating. It must be followed by magnesium for maximum effectiveness.

With our cows, this helped within 48hrs.

With our goat, we gave calcium, in the form of Natural Vitality’s ‘CALM’ Plus Calcium, with water, in a drench, and she ate all the kelp she wanted. Plus dolomite/molasses mixed in with her feed, once the appetite returned. This ‘cured’ her in about 6 hours.

-Treatment- (Dogs)

With dogs, being sure they have the minerals can be a little more tricky- since they don’t eat hay or graze. (Like ourselves) Although, sometimes, our dogs will eat a little grass. 🙂 Our dogs have never wanted loose mineral in the above forms. So, we try to ensure their levels are right, by feeding them raw milk, raw scraps from our home butchering, and soup bones.

We only dealt with it once with one of our dogs, she was very restless. Once we realized the cause, we treated her with the following. Since then, have not had this issue reoccur. We give our female dogs these things every time they have a litter.

We treated her with:

All the bone broth she would drink

Nutritional Yeast (for the B vitamins)

Black Strap Molasses (for the iron)

Yogurt, and raw milk

This cleared her up, (and she went to sleep!) in about 3 hours.

Remember “prevention is better than a cure”. So, keep up those minerals in yourself and your animals.

*Podcast* Should Believers Breed Unclean Animals?

Should Believers breed unclean animals? We will discuss the answer from the Scriptures, in today’s podcast.

Listen here:

“But now they that are younger than I have me in derision, whose fathers I would have disdained to have set with the dogs of my flock.” Job 30:1 (Job had sheepdogs)

Natural Remedies: Toxemia/Twin Lambing Disease in Sheep

Prevention, Symptoms, and Treatment

PREVENTION AND CAUSE

The best prevention is to keep your sheep’s minerals up, especially calcium, so it doesn’t happen in the first place. The cause of the disease is inadequate nutrition during pregnancy, and not enough nutrient and minerals for the ewe and the lambs.

SYMPTOMS

Symptoms include: lack of appetite or going off feed totally, no energy toward the end of pregnancy, sweet smelling breath, muscle twitching, poor muscle control and poor balance, head hangs low/droops, and grinding teeth.

If you start to see a ewe have these symptoms, take action RIGHT AWAY! If you don’t she could lose her lambs and/or die herself.

It is important the help her QUICKLY!

TREATMENT

Take her away from the flock, and keep her by herself. Keep her where you can monitor her frequently. You must do the following, even through the night, to save her and the lambs lives.

Give her 8ml of Nutri-Drench ASAP, every 2 hours

Nutri-Drench is something we keep on hand on our ranch, all the time. We give it to any animal that is feeling under the weather and to newborn lambs, kids, and calves.

Also give one teaspoon of Natural Vitality Calm plus Calcium in water, every 2 hours.

Feed free choice (as much as she once available at all times) Kelp and all the good quality hay she will eat with molasses on it. Since this disease is related to low blood sugar, the molasses is important to help keep it up.

You also want to give her free choice grain, until she gets her appetite back.

It is important to also give her Vit B shots, this will stimulate her appetite. Give the amount the instructions on the bottle recommend. We gave it 2-3 times a day, until she started eating again, and then gave it once a day for a until she lambed.

CONCLUSION

This is what we did for one of our ewes when she had this sickness. We are thankful to God, that she recovered and her and her lambs survived. She had two beautiful ewe lambs.

REMINDER

The next year, we learned, and kept her up on her minerals. She had twins again, but this time with no troubles at all. Praise Yehovah! Remember, if you keep their minerals up, this won’t be a problem.

We set minerals out for them to have free choice. These are the minerals we use. Click on the mineral for a link to where you can find them.

Kelp (depending on how much you have out, they usually have this one empty right away!)

Copper Sulfate (sheep do need copper, and will take what they know they need)

Redmond Livestock salt

Dolomite (make sure the calcium content is higher than the magnesium content),

Yellow dusting sulfur

We also feed Non-GMO alfalfa pellets (high in calcium) with their grain ration (Non-GMO Corn/Wheat) for the last six weeks of pregnancy, to help keep up their calcium levels and prevent blood sugar problems and toxemia.