
Introduction
Who doesn’t enjoy eating a fresh tomato? When you grow them yourself, they are so much better than the hothouse ones from the grocery.
Tomatoes can be a hard thing to get to take off at first. But when you have fresh tomatoes of salsa in the summer or tomato juice to make chili in the winter, it is so rewarding! It is also a good time to remember to give Thanks to Yehovah for all things he has given you.
Planting
To start your tomatoes you will want to start them in late winter, in either your potting shed or greenhouse. If you don’t have either of those things, you can always start them in your house.
First, begin by having your trays and potting soil on hand. Really broke down compost makes good potting soil!
Fill your tray(s) with your soil and push it down until it is about 3/4” from the top of the tray. Water the soil lightly. This will make the seed not go down too deep when you water again after you have planted the seeds. Why does that matter? Because if the seeds go down too far, the seed will not sprout; it will rot.
Now, put 1 seed in each cell and cover them by topping off each cell with more soil. Make sure to keep the soil moist by watering them. Keep them as much in direct sunlight as possible. Within 7-14 days, they should begin to sprout, depending on how much sunlight they are able to get. Remember, if you are planting more than one variety, to put markers so you know which varieties are which.

Note: At this point, they may become spindly. If they are still short and just a little spindly, they should end up being fine. If they are VERY spindly, so that they are weak and snapping, don’t worry! They can still be saved.
Very carefully, pull them up out of their cell with your fingers. Do it one sprout at a time so that you don’t end up with a mess. Fill your cell with dirt and make a hole in the dirt by pressing down your finger about an inch and a quarter. Now put your spindly little sprout down into the hole and fill the little hole back in. Your objective will be to have the spindly part covered in dirt up to the leaves.
Taking Care of the Young Plants
Keep a close eye on your sprouts, and make sure that they maintain a good green color. You do not want them to begin turning a pale yellow color. If they start to turn a pale yellow color you need to act quickly so that you do not lose your plants. Put broke down compost around them to ‘feed’ them, because they turn pale from not getting the nutrients they need. This should turn them around pretty quickly.
If it starts to warm outside, into the 50F range or above, you need to bring them outside in the daytime as much as possible to make sure they get as much sunlight as possible. But be sure to bring them in when it is cold, you don’t want them getting frosted on!
Transplanting
About 35-40 days after planting, your plants should be too big for their cells. It is time to transplant them.
We transplant ours from their cells right into 9 oz cups. You should be able to find this size cup at pretty much any store. Either plastic or thick paper work well. You want to make a little hole in the bottom of each cup to make sure the excess water can drain out.
Fill your cups a little over 1/4 way full of potting soil/compost and put your plant in. Then fill the rest of the cup with soil until it is all the way up to the leaves. When finished, water them. Keep in mind not to let your plants be in too cold of temperatures or get frosted on!

Planting Outside
The timing on planting outside is all going to depend on where you live. Look up the last frost date for your area. Sometimes it will frost after the ‘last frost date’ but it will give you a pretty good idea of when it is safe to move your plants outside for good. We usually plant our tomatoes outside within the week after the last frost date for our area.
This gives us a pretty good chance of having some really early tomatoes.
To plant, just dig a hole in the ground, put compost, water, and your plant all in the hole and cover with dirt. We plant ours between about 4 rows of corn. This helps keep them shaded and prevent sun-scalding from happening to the tomatoes when the fruit begins to come on them in a few months.

Keep your plants moist and watered until they are established.
If they start looking pale, or you don’t see them beginning to bloom, or even not too many blooms, compost your plants. You should also put a small handful of Epsom salt in a gallon of water and put it on your plants. This brings up the magnesium and help your plant have more (and more productive) blooms.
When your plants get bigger, you may notice they start to cover your walkways and take over the garden. It’s time to tie them up!
Set posts on each end and in the center of your rows as close as they need to be to keep a straight line and not have the plants sag. Run your string post to post, tying up your plants as you go. The end result should look something like this:

Keeping your plants tied up will help to prevent blight. More tomato related issues, and how to deal with them , to come in another post soon!
Harvesting
This is one of the things we all look forward to every year! Who doesn’t look forward to eating a fresh tomato? And harvesting tomatoes is simple; all you have to do is just pick them off your plants!
Be sure to give thanks to our Heavenly Father for his wonderful blessings. And remember to bless others with the first-fruits of all your increase! (Prov. 3:9)
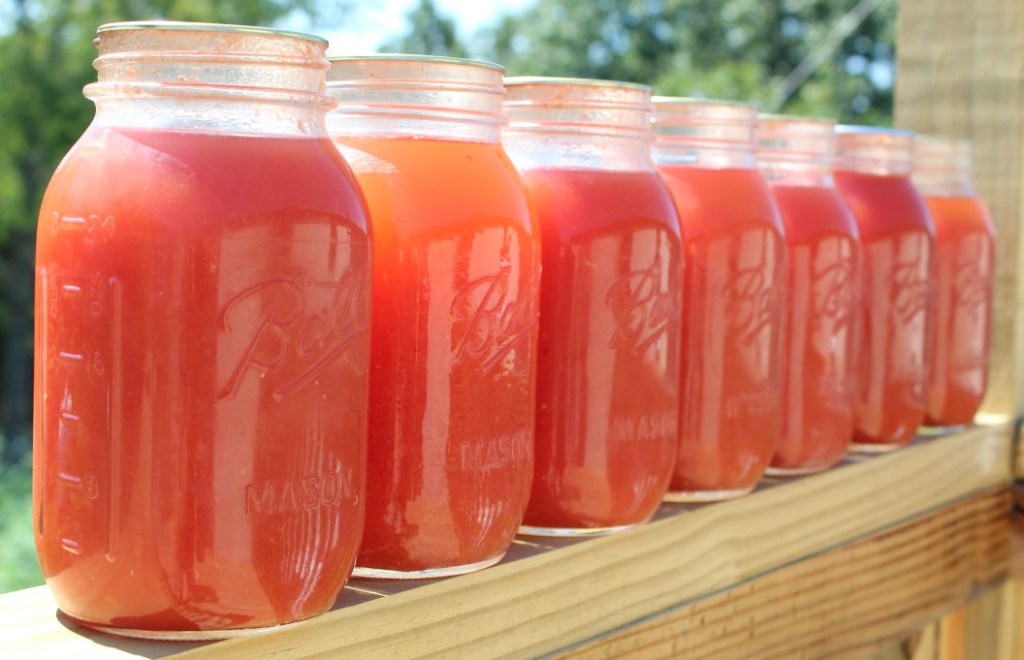
Preserving (Canning) Tomato Juice
There are many different ways to preserve tomatoes. But we are going to focus on canning them as juice today.
Juice
Wash your tomatoes and cut them in quarters. Put a pot on to cook down and keep it stirred. If they are not already juicy enough and, even when stirred, seem to want to burn easily, you can add a little water if need be.
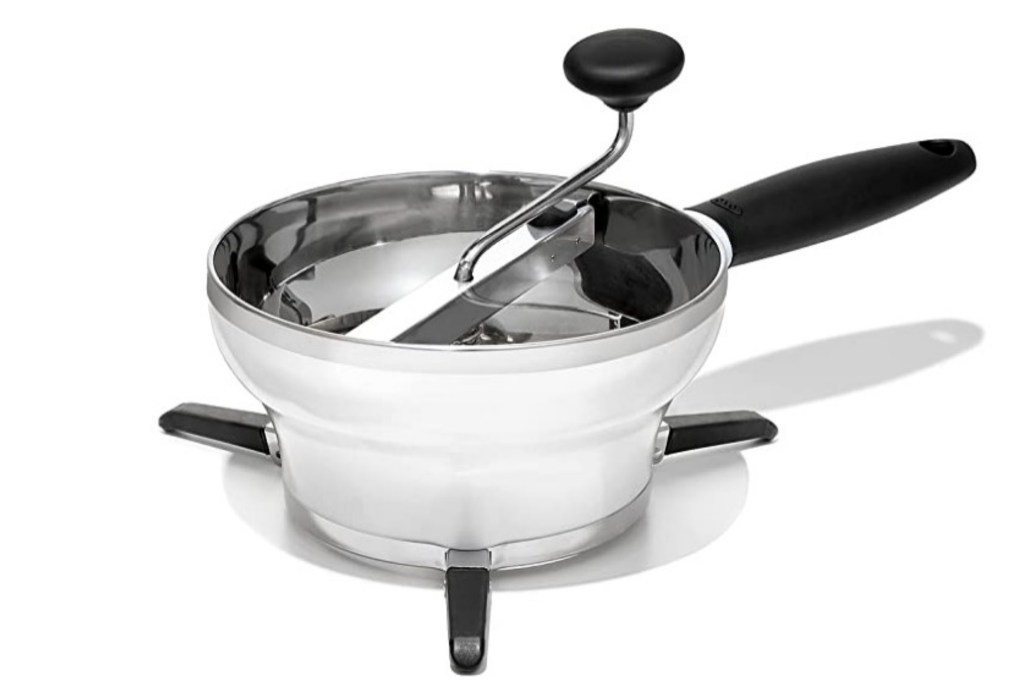
When your tomatoes have cooked down (you’ll be able to tell as they will just seem like ‘mush’), run them through your food mill, the same as you do applesauce. (see post here)
When you have finished this process, put your jars into the oven on ‘warm’ setting, or the lowest your stove will go (most go down to 170F and this is suitable)
We are going to do what you call the “water bath” method.
Fill your canner half full of water and turn your burner on.
Now you should have hot juice, hot jars, and a hot canner ready to go. Ladle that hot juice into your jars and wipe the rims clean. Then, place your lids on your jars and screw on the rings tightly. Place in your canner and put on the lid on, but do NOT lock it on. When your water starts to boil, set your timer for 35 minutes.
The next step is taking them out of the water. Start by placing a towel on your countertop and then put your jars on top of the towel, using a jar lifter to keep from getting burnt. A jar lifter is pictured below:

Let your jars sit on your counter for 12 hours. Check seals and store.
The reason you want to check the seals is to make sure they are all secure before you store them.
You check the seals by tapping the jar lids with one finger. As you tap them, listen for a jar that sounds different than the rest of them. It will usually make a hollow sound.
If you find a jar that hasn’t sealed, put it in the fridge and use it soon. If you are planning more canning, you can try to can it again. Make sure there are no nicks in the top of jar and a good lid on it.