In the 1st part of today’s chapter, Repentance, a time for everything, planting at the right time and with dedication and preparation, Johnny Appleseed, knowing what time it is, and Dancing.


In the 1st part of today’s chapter, Repentance, a time for everything, planting at the right time and with dedication and preparation, Johnny Appleseed, knowing what time it is, and Dancing.
Zucchini is one of the easier vegetables to grow, making it very rewarding. If you can take keep the squash bugs away, you can get a lot of zucchini from just a couple plants!

You want to make sure you get heirloom seeds. We like the Black Beauty variety. We start zucchini in the spring, and then again in the fall. First you will want to make a hill about 6” tall and 1” wide. Then, put two seeds into each hole, 2” apart and push down a half inch. Cover with manure or compost, and water well.

When your plants look like the above photo, it will be time to feed them again. Put 3 TBSP of kelp around the base of each plant, then add some more compost or manure. Continue to water as needed.
If, as your plants grow and start to bloom, you see only male and no female blooms, you won’t get many zucchini without doing something about this.You need males to pollinate the females. The female plants are the ones that will turn into a zucchini. If you do not know the difference in male and female blooms, use the photo below as a guide.

If we have this problem, here is what we do to help.
De-solve 2 TBSP of Epsom salt in a gallon of water and pour it around the base of the plant. Do this for each plant that you are having the problem with.
You can harvest your zucchini whatever size you like them. To harvest, all you have to do is grab the fruit and twist. If you like them small, make sure you keep an eye on them. They get big very quickly! The bigger they get, the more spongy they will be, and are less tasty when they are spongy.
If you are wanting to save seed from them, let one get as big as it will. Sometimes they will turn an orange-ish color once they are big. This does not mean you can’t save seed from them. They are still good for seed.
When you harvest, remember to pray who to give your first fruits to!
Honour Yehovah with thy substance, And with the firstfruits of all thine increase: So shall thy barns be filled with plenty, And thy presses shall burst out with new wine.
Proverbs 3:9-10
When you pick the one you have let grow and go to seed, pick it and cut it open. Scoop out the seeds with a spoon, and lay the seeds out to dry on a tray for 2-3 days. Then, store in a jar with an airtight lid.
The best way to preserve your zucchini is to either freeze or can it.
To freeze the zucchini, first you need to shred it. We have not had good success with freezing slices. When you have finished shredding the zucchini, squeeze out the juice/water. Put in a Ziploc bag and freeze.
To can, we use the following recipe:

Want a way to use your shredded zucchini? We enjoy making Zucchini bread, too! You can even use the above recipe for Pineapple Zucchini in place of the regular shredded zucchini the recipe calls for. We love using the recipes from America’s Test Kitchen, and this is one of them.

It is always rewarding, and in our opinion better tasting, when you grow food yourself on your own land. You know where it came from, what you put in to it, and each step in between.
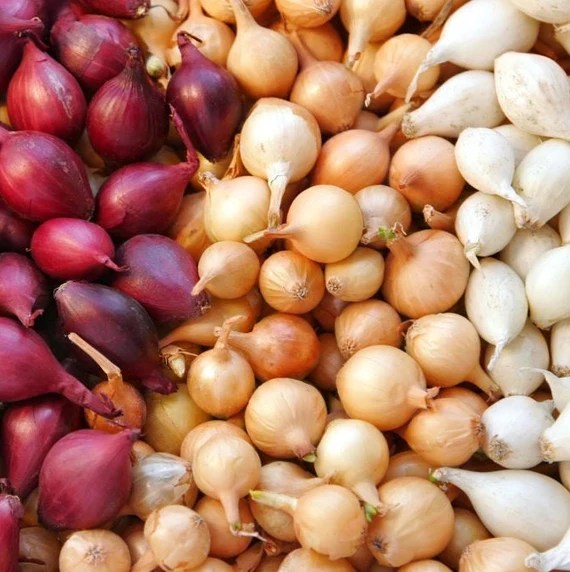
You should be able to find onion sets at most local farm stores. You will usually find yellows, reds, and white. In our experience, the reds (AKA purple) store the worst, yellows the best, and whites in the middle. We usually plant three of the bags that the farm store has. We have a good time each year playing ‘How many are in the bag’ as a family!
Early Spring is the time to plant your onions. We prefer to plant our onions on little hills. We found that planting them in little ditches makes them hold the moisture in. In our experience, this causes the onions to rot and not store well.
So, with a hoe, make small hills, about 6 inches tall. Once you have finished, push your onions one by one into the top of the hill, leaving only the stem sticking out of the ground. You want to place them about 4 inches apart from each other, so they have room to get good sized.
We like to put grass clippings (from the yard, not hay necessarily) in between our onion rows. We add another layer every couple of weeks. This helps to add nitrogen to the soil for the onions, as well as keeping in the right amount of moisture for the onions as they grow. This is very important when the heat of summer comes. The grass clippings also help a lot in keeping the weeds down in the onion patch. If you start to see buds come onto the tops of your onions, clip them off if you do not want them to go to seed. If they go to seed, the onion itself will not be good for eating. But if you want to keep seed, you can let a few go ‘bolt’ and there will be seeds for you at harvest time.
When the tops of your onions bend over (die), it is time to harvest! The onions will not continue to grow after this happens.
To harvest your onions, all you have to do is pull them out of the ground and lay them out to dry. The below idea will help them to dry out as fast as possible. Make sure you have them under a roof, out of the weather. You don’t want them to have any moisture in them when you store them, or they will rot, regardless of the color.

If you decide to lay them on a flat table, you will need to be flipping them every few days so they will continue to dry and not just send the moisture deeper into the onion.
Pulling your onions and seeing how much they have grown is a VERY rewarding time, and it is a great time to Praise Yehovah for your blessings and give him thanks!
When most of the tops of your onions are brown and there is no moisture left in it (rather than being bendy, the tops will be brittle) it is time to store them.
We like to braid our onions, the same way we do with our garlic. See below, and also our Garlic post.
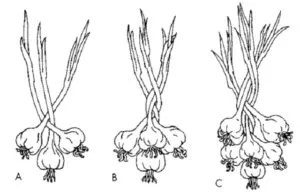
When you have finished braiding your onions tops, hang them in a cool, dark, dry place.
Potatoes are one of our favorite things to grow. They aren’t the easiest thing to grow, but the harvest is a very rewarding time. And like most things, homegrown potatoes taste the best!
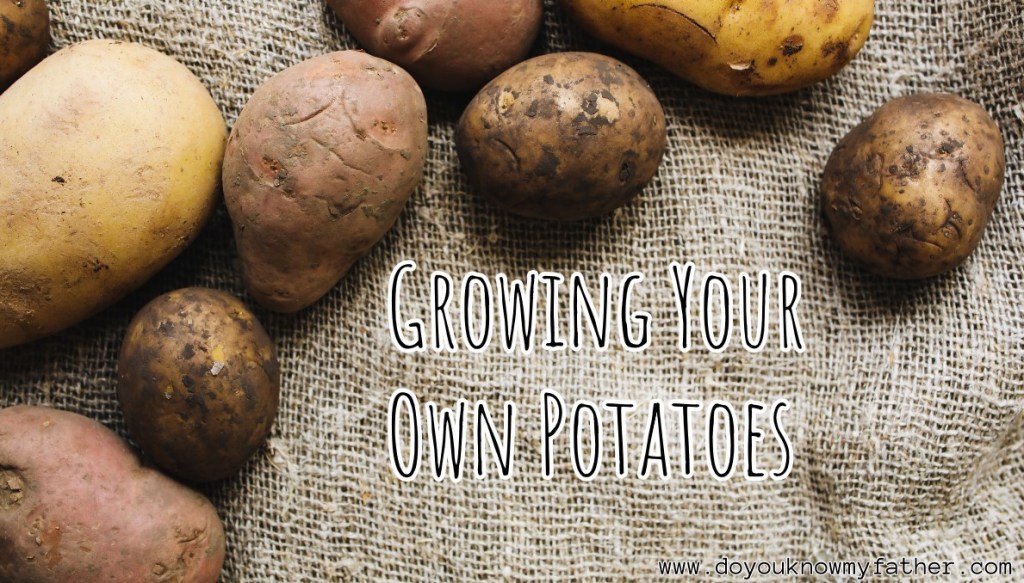
First you will need to buy your seed potatoes. Most local farm and hardware stores begin to carry them in the late winter and early spring. A good seed potato will have little sprouts coming out of it, also called ‘eyes’. They are sometimes a little squishy, but this is okay as they will just end up rotting in the ground. You want to look for a light blue tag on your potato bag, to make sure it hasn’t been treated with chemicals to keep them from sprouting. (see below)
You will want to get enough seed potatoes that you will have enough to eat on until next years harvest, and some left over to plant. Then you will not need to get seed potatoes next year!

You will want to plant your potatoes in the spring. You need to know the frost dates for your area, to get an idea of when to plant them.You can plant them about two weeks before the last frost date, as they won’t be above ground until after the last frost is expected. If you do it earlier and they start to pop out of the ground before the frost, the frost will kill them. It can be hard to wait, when you get some warm days and want to plant, but it is worth waiting so you don’t have as much chance of loss.
When you are ready to plant, you just need your potatoes and a good hoe. With your hoe, make a hole big enough to put your potato in. Then, put a whole potato, or a couple of little potatoes, in each of the holes you made, the ‘eyes’ (or side with the most eyes) pointing up. The more potatoes you put in, the more potatoes you will end up with when harvest time comes!
When you are finished putting all your potatoes in the holes, sprinkle them with sulfur. We do this for a better harvest, as well as to keep bugs away. Sulfur helps them with nitrogen uptake, amino acid formation, and vitamin and mineral synthesis.
Add some water to your hole.If your soil is poor, like ours is, it is a good idea to add some manure into the hole as well.
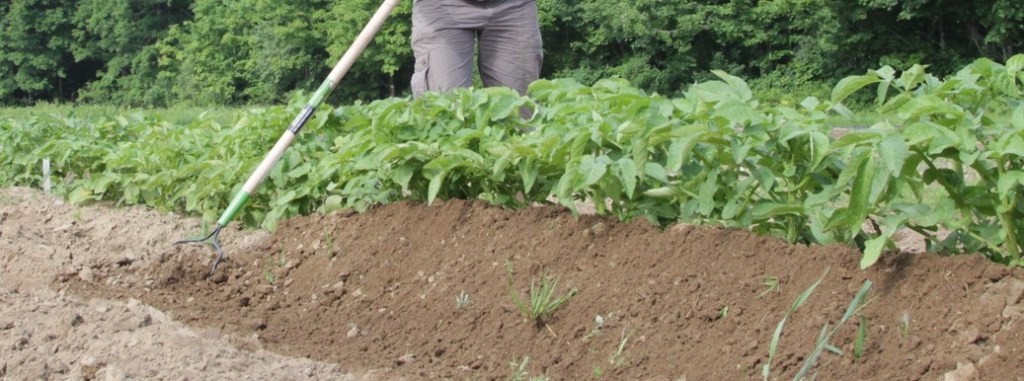
After you have done these things, you want to hill your potatoes. You can do this with a hoe or a garden rake. Manure the hill again when finished. In a month or so, you will see them start poking out of the ground!
In the spring and early summer, you will probably not need to water if you get sufficient rainfall. Keep an eye on the moisture of your soil, and that it doesn’t get too dry.
When your plants are 3 months old, or 3-4′ tall, they should start to bloom. If they don’t they might need more nitrogen, or they might be low in magnesium.
If they need more nitrogen, add manure. If they are low in magnesium, spritzing them with Epsom salt water will help them begin to bloom. You will add 1 TBSP per gallon of water.
If they still don’t bloom, it DOES NOT mean there are not any potatoes underground. We had a year where there were only a handful of blooms in our whole patch, and we still had a good harvest.
Around this same time, you will want to hill your potatoes a second time.

When the plants are laid over, dry, and dead, this means it is time to harvest!
Do not dig your potatoes on a wet day, wait for a day when the soil is dry.
Take a potato fork and dig into your hills. Be very careful. If you aren’t careful, you could stab into your potatoes. It doesn’t ruin them, but you can’t store them if they are punctured. They will need to be eaten or preserved another way quickly so they don’t rot.
Pick up your potatoes, and put them carefully into crates, being careful not to bruise or scrape them if possible. Sort out the ones that will keep longer from the ones that you need to use up first. (These will include the ones you may have accidentally forked, have bug holes, etc). DO NOT wash your potatoes until you are ready to use them, as this will also cause them to rot quickly.
We follow this scripture, pray, and give the firstfruits of our increase (the harvest) to who God puts on our hearts.
